
How to Use KOMA KOMA
1. Shooting Screen
After the opening movie, you will enter the shooting screen, and the program will be ready to shoot. It is very easy to use.
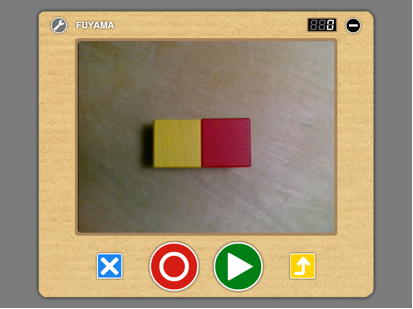
◆ What the buttons on the shooting screen do:
![]() Shoot : Takes on frame
Shoot : Takes on frame
![]() Play : Plays the animation repeatedly
Play : Plays the animation repeatedly
![]() Delete : If you click on the button quickly, only one frame will be deleted. If you hold the button down, all frames will be deleted.
Delete : If you click on the button quickly, only one frame will be deleted. If you hold the button down, all frames will be deleted.
![]() Save : Hold the button down to save your work.
Save : Hold the button down to save your work.
![]() Settings : Click this button to change things like the frame rate and camera settings.
Settings : Click this button to change things like the frame rate and camera settings.
◆ Shooting
Go ahead and try putting something in front of the camera (you can use anything, even your hands). For this example, we are using building blocks. Once you have decided the positioning for your first frame, press the “shoot” button. The sound of the shutter clicking lets you know the shot has been taken. After this, as we change the position of the blocks, we can still see the first frame (it is overlayed transparently). We will change the position and direction of the blocks while referencing the first frame, and then press the “shoot” button again.
Now we have taken our second frame, and we have a short, 2 frame animation. Try holding down the “play” button. There will be a sound to let you know its working, and the 2 frame animation will play on a loop. How about that? Isn’t this fun!?
We can continue and make the video longer by taking a 3rd and 4th frame in the same way. The counter in the upper right hand corner of the screen is shows the frame number. KOMA KOMA can only shoot up to 999 frames.
◆ Delete
If you mess up a shot in the middle, press the “delete” button quickly to delete a single frame. However, you must be careful of the “delete” button, because if you hold the button down, you will hear a toilet flush, and all of your frames will be deleted.
◆ Save
Once you have finished your work, try holding down the “save” button. There will be a sound to let you know that it was saved properly, and then you can start a new project from scratch. (Of course you can continue to work on your saved project, but that will be explained later)
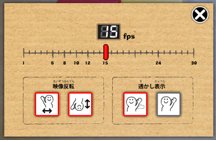
◆ Settings
If you press the “settings” button, the filming settings screen will appear, and you can change the frame rate (the number of frames that will be shown per second). From this screen, you can also adjust the camera input settings to move the image up, down, left, right or reverse it, turn the transparent overlay on and off, and more.
After saving some projects, let’s click on the minimize button in the upper right hand corner of the screen, and move over to the reflection screen.
2. Reflection Screen – Basic Clip Commands

◆ Basic Clip Commands-Move, Expand/Shrink, Play
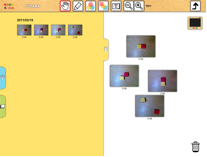
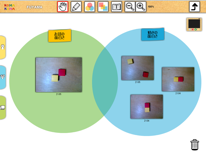
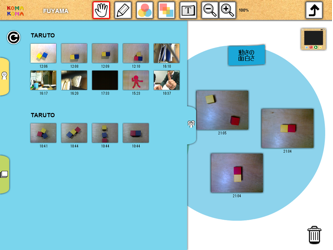
When you move to the reflection screen, your “my works folder” will automatically be loaded. In your “my works folder”, clips from all of the projects you have made will be displayed in chronological order.
First, drag and drop clips onto the white page on the right hand side, and arrange them how you want.
After you have set several clips in place, click on the “my works folder” tab, and close the folder. Now you can move the clips around on the page, and expand or shrink them by clicking on one of the corners and dragging.
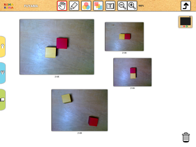
If you click on a clip again, the clip will start to play on a loop where it is. Click on the clip again to make it stop. By clicking on several clips, you can have several playing at the same time. You can get all of the clips in the folder to play back in the same way.
◆ Full Screen Playback
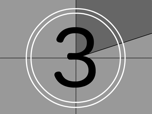
Double clicking on a clip will cause it to be played in full screen mode. When playing a clip in full screen mode, there will first be a countdown from 5, and then the clip will play on a loop. Clicking anywhere on the screen will exit full screen mode.
◆ Deleting a Clip
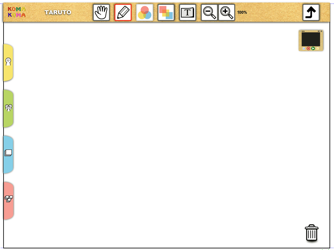
You can delete clips on the page by dragging them onto the trash can icon in the lower right. However, deleting clips in this fashion will only delete them from the page, and they will still be saved in the folder. (As part of the process, we believe it is important to keep all KOMA KOMA projects, even ones people messed up on, and have therefore made it impossible for users to delete clips from their folders.)
◆ Moving the Entire Page
You can move the entire page by clicking a blank area and dragging. The page size is infinite. To look at the entire page, try using the zoom tool to zoom out.
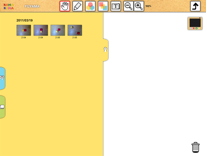
3. Reflection Screen – Drawing Tools
◆ Drawing Tool
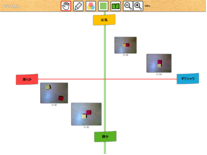
In the reflection screen, it is possible not only to edit clips, but there is also a simple drawing function, and you can even add text with tags.

If you hold down one of the buttons, a “drop down menu” will be displayed, and you can change the function of the buttons. The circle tool and the square tool and automatically set at the beginning to give you a different color shape each time you use them, but you can set the color you want to use with the drop down menu.
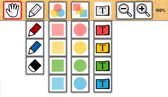 Contents of the Drop Down Manu
The items in the drops down menus are easy to understand, but you should take not of is that the way to delete lines that you have drawn with the pen is different from the way to delete shapes and tags that you have created with the square or circle tool.
◆ Deleting Shapes
- To delete lines drawn with the pen tool : Use the eraser to erase
- To delete tags and shapes drawn with the circle or square tool : Put them in the trash can
You should also note that lines drawn with the pen tool are put at the bottom layer, so if you put a clip or a shape on top of the line, it will cover it up and you will no longer be able to see it.
◆ Example of a Reflection

4. Reflection Screen – Other Commands
◆ Saving and Loading Reflection Pages
You can save your reflection page by clicking on the “save page” button in the upper right hand corner. Data that you save will be stored in your “reflections folder” in chronological order. You can re-open these files by dragging and dropping them onto the page.
![]()
◆ Clip / Reflection Information
Clicking and on the reflections and clips in your folder and holding the button down will display their detailed information. Here you can give them titles or write comments about them.

◆ Print out Flip Book Sheet
 If you press print out button on Clip Information window, all frames will be printed on Flip Book formatted sheet.

◆ Going Back to the Shooting Screen
There are two ways to go back to the filming screen.
- ・If you want to start shooting a new animation → Click on the filming screen icon
- ・If you want to work on a preexisting animation → Drag the clip you want to work on and drop it on the filming screen icon
Note:
It may take a while to load the data for clips with a large number of frames. For such clips, it might take a minute before you can start shooting again in the filming screen.
◆ Closing the Program
Click on the KOMA KOMA logo in the upper left hand corner of the screen and hold down the button. The “settings” button and “close” button will appear. If you click on the “settings” button, the program’s settings menu (explained below) will appear. If you click on the “close” button, the program will close.
◆ Program Settings Menu

User Management:
If many users will be using KOMA KOMA on the same computer, please select the “select user” option.
Location to Save Data:
You can manually select where you would like user data to be stored.
Camera Selection:
If you have several cameras connected to your computer and want to manually select which one to use, select the “manually select camera” option, and choose the camera you want to use from the list.
Frame Display :
“Count up” is selected as the standard. If you select “count down”, the counter on the filming screen will start from the number of the last frame, and count down from there. Counting down could be useful at a workshop where you set a number of frames and tell the people to “make a one second animation that uses 24 frames”, for example. Using the count down setting in such a case could help the people to concentrate on their work.
5. Using KOMA KOMA with Multiple Users
KOMA KOMA has been set up with an easy user management system so that multiple users can use the program from one computer. If you select the “select user” option in the “program settings menu” and restart the program, the program will take you to a log in screen upon loading.
◆Log in Screen
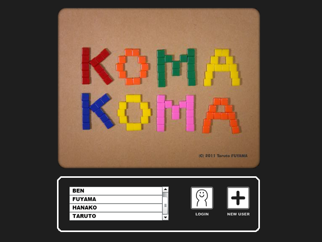
Click on the “new user” button on your first use, and create a new user. The user name must be in all capital letters, and cannot exceed 12 characters. Once you click on the “OK” button, the program will take you to the filming screen. The next time you use the program, select your user name from the list at start up and then click on the “log in” button to log in.
◆ Everyone’s Works Folder
When using KOMA KOMA with multiple users, there will be a folder called “everyone’s works folder”, clips of the other users will be displayed. If you push the load button in the upper left hand corner of the folder, the program will get the latest data. You can put the clips from the “everyone’s works folder” onto the page, just as you can with your own clips. However, you cannot change the title or information of clips that are not yours.
◆ TEACHER Account
If you log in using the following steps, you will be given administrator authority, and can see all users’ reflection data.
- Click on the log in button on the log in screen, and hold the button down.
- Log in with the user name “TEACHER”
The fourth folder will be the “all users’ reflection folder”.